Last fall, our friend (and editor) Melanie reached out with the desire to design her own stencil—and use that stencil for one of our of our Custom DIY Kits. She documented her process here, and we’ve named her design “Circus”—as a nod to her high-flying talents. (She also likes the subtitle, “If Not Now, When.”) Seen above, the finished artwork is approximately 24.3” x 30.1” and is the result of several months of work and many conversations between our studio and hers. Melanie has open sourced the work, and you can download the full-sized stencil design here or use it to create one of our Custom DIY Kits.
When I spoke with her on the phone last week, she mentioned that “creating a stencil from scratch was much harder than I expected. You’ve made it seem so easy.” I have to admit that this made me giggle a bit because I once felt the same way. When you are learning just about any skill for the first time, there is a moment when it just feels hard. To date, we have over 550 stencil designs in our archives, and there are some days where it still feels challenging.
As Melanie was starting, we tried to give her a few tips, which we’ve shared below:
Think about the size and the shape of the individual motifs you are designing and how these shapes interact with one another.
You can create a design where the primary motifs of the stencil have a similar scale (or size)—as we have done with our New Leaves and Anna’s Garden stencils.
Or you can manipulate the scale of all the individual motifs—like our Magdalena stencil—where small and large shapes are combined in a single stencil design.
Think about the embroidery techniques you want to use and how they will be applied to each of the motifs and also to the individual shapes of the motif. For example, if you know that you like to work in reverse appliqué, you will want shapes that are larger than 1/2″ so that you can trim your outer layer of fabric after sewing.
SIDENOTE: Many of our stencils have both larger and smaller motif shapes combined. We often use embellishments such as appliqué and/or a satin stitch to embellish these smaller shapes that are too small for reverse appliqué. See Bloomers and June’s Spring stencils.
If you are working in Adobe Illustrator or any other graphic design program, stop and print out your stencil to better view the scale of your design and the placement of individual motifs.
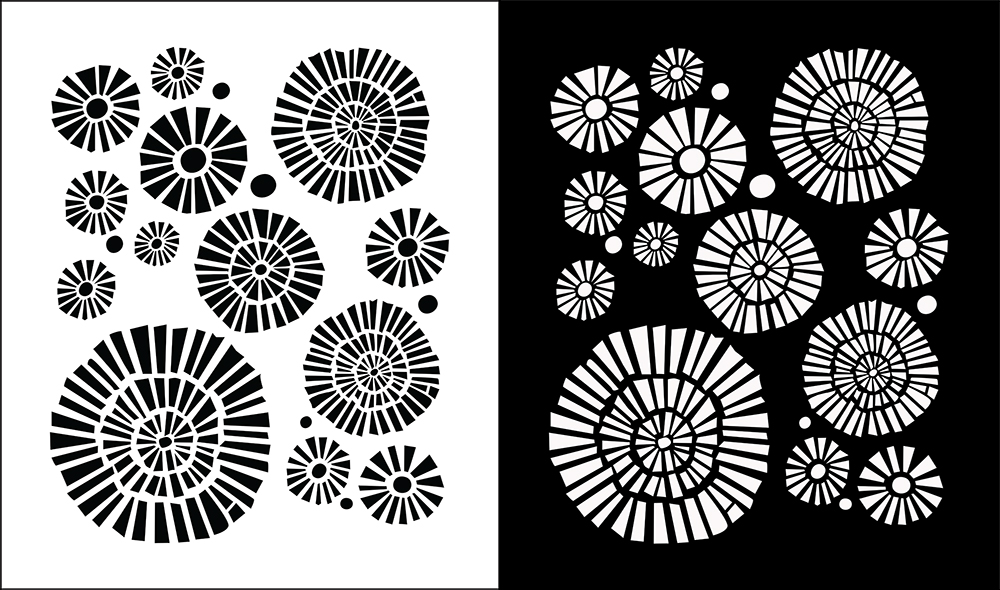
Think about both the positive (the individual motifs of the stencil) and the negative spaces (the area between the individual motifs). You can invert the color of a black and white design to white and black to better understand the relationship between positive and negative space.
Allow a minimum of 1/8” space between individual stencil motifs that your cut stencil remains sturdy over time. If your shapes are too close together, your stencil can become fragile and break.
We often to make our stencils that we intend to use all over a garment or project a minimum of 18” x 24” total size that we can more easily airbrush larger fabric areas. However, we use different size stencils for different purposes. If you are only adding stenciling to the neckline of a garment, you may choose to create a smaller stencil.
Here are some sizes of a few of our favorite stencil designs:
Anna’s Garden: 22” x 28” finished stencil size | 19” x 24” cut stencil area
Fern Stencil: 28” x 22” finished stencil size | 24” x 17” cut stencil area
June’s Spring: 23 1/2″ x 24” finished stencil size | 19” x 21 1/2″ cut stencil area
Large Polka Dot: 31” x 46” finished stencil size | 22” x 38” cut stencil area
Magdalena: 42” x 27” finished stencil size | 35 1/2” x 20” cut stencil area
New Leaves: 31 1/2″ x 47” finished stencil size | 25 1/2″ x 40 1/2″ cut stencil area
Research pattern and stencil designs for inspiration, make photocopies, cut things apart, trace, try to understand what is appealing, and then start putting the pieces back together again. You may find that you migrate from the original motif as your voice and hand take over the work.
I like to work with photocopies of motifs that I scale up and down, cut up and paste, and then trace over again and, sometimes, again. This multilevel process makes me feel like I have more control over the final stencil design. Others like to work directly in graphic design computer programs, like Adobe Illustrator.
Once your motif has been finalized, the process of making a stencil is a simple process. When cutting, be sure to leave a minimum of a 2” border around the outside of your cut stencil for stability.
Look for #stenciling on our Journal to read posts about stencils and stencil transfer, find more on stenciling in our Alabama Studio Series, and share any tips you’ve learned in the comments below.
Subscribe to Build a Wardrobe 2016 and receive a discount code for 25% off your next purchase of stenciling supplies. Use the tags #buildawardrobe2016 and #theschoolofmaking to join the global conversation.
The post ON DESIGNING STENCILS appeared first on Alabama Chanin | Journal.